 Finally,this is my final POSTER~~~
 A frame is created with 3pt STROKE.
 A new layer is created for the flag. Flag with text ''THANK YOU'' is created with RECTANGLE TOOL, chocolate color for the stick and yellow color for the flag . The font i used for the ''THANK YOU'' is 1pt STROKE, COMIC SANS MS, regular and 10.59pt. Another type of flag with the symbol of my assignment 1 is created with the same skills but different color and no text.
 GROUP the first penguin and COPY & PASTE with many times to form a troops of penguin. The size of the penguin is change and modify according to their position.
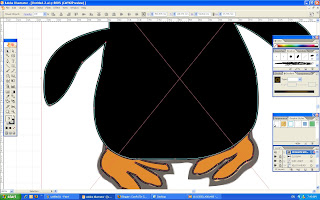
 A new layer is created for the penguin. The reference of penguin is insert as the TEMPLATE form, the body and leg of penguin is draw with the PEN TOOL. Color is applied using the EYEDROPPER which pick the true color from the reference. Sublayer is created to draw the details of the penguin like mouth and eye. ELLIPSE TOOL is used for the eye, and PEN TOOL for the mouth.
 A new sublayer is created for the description. The ROUNDED RECTANGLE TOOL is used to create a white color space for the text. The text insert by using TYPE TOOL with 1pt black color STROKE, SHOWCARD GOTHIC character, regular and 150pt size.
Another new layer is created, the slogan ''KEEP IT UP'' is done by using the TYPE TOOL with 2pt STROKE and GRADIENT of red and purple color one by one. After that, the 3D EFFECT is applied to them and adjust the position.
 Now is the turn of the sun, a new layer is created and the FLARE TOOL is used to created the sun, after that drag the sunlight to the ice caps.
 After the main igloo is completed, COPY & PASTE it and applied the REFLECT to the sub-igloo. Adjust the size of the sub-igloo, and slightly ROTATE it and then put it far away.
 A new sublayer is created to draw the flag. PEN TOOL and ELLIPSE TOOL are used to form the shape of the flag. After that, the same color and gradient is applied like the previous step.
 Like what i mention just now, head of the igloo also mixed up with the body, so a new layer is created, the ELLIPSE TOOL is used to form a circle shape and the PEN TOOL is used to draw the base. The light blue color is applied with LINEAR 45o GRADIENT.
I found out that the door of the igloo is mixed up with the body so now i create another new layer for the igloo's door. Same, the PEN TOOL is using to draw the door, GROUP them and color it with light blue, LINEAR 45o of GRADIENT is applied.
 A new layer is created for the igloo. This time i didn't copy from the previous assignment because there is a lots to improve and modify need to do , a references of igloo is insert and set as TEMPLATE. The PEN TOOL is used to draw the body of the igloo. After that, GROUP them and color it with light blue, LINEAR 45o of GRADIENT is applied.
  After That, a new layer is created again and the ice cap that i use is copy and paste from my assigment 2. The size and the position of the ice caps is changed.
 Another layer is created and this time it will be the sky. Like the previous step, a RECTANGLE TOOL is used to form a bigger rectangle shape. The sky blue color is applied with the LIVE PAINT BUCKET and GRADIENT also.
 First of all, the SHOW RULER and SMART GUIDES are opened to help me on the later works. After That i use the RECTANGLE TOOL to form a rectangle shape and apply the color using the LIVE PAINT BUCKET. The light blue color with the GRADIENT rectangle will be the ice land.
No comments:
Post a Comment