Monday, September 8, 2008

FiNal DesiGn Of AsSigMenT 3

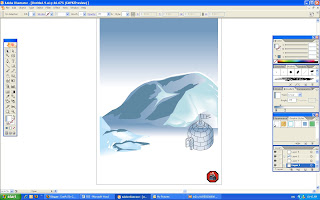
Finally,this is my final POSTER~~~
A frame is created with 3pt
STROKE.
A new layer is created for the flag. Flag with text ''THANK YOU'' is created with RECTANGLE TOOL, chocolate color for the stick and yellow color for the flag . The font i used for the ''THANK YOU'' is 1pt STROKE, COMIC SANS MS, regular and 10.59pt. Another type of flag with the symbol of my assignment 1 is created with the same skills but different color and no text.
GROUP the first penguin and COPY & PASTE with many times to form a troops of penguin. The size of the penguin is change and modify according to their position.
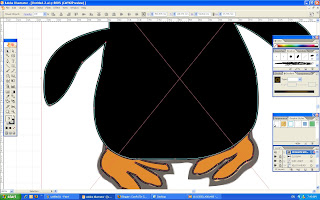
A new layer is created for the penguin. The reference of penguin is insert as the TEMPLATE form, the body and leg of penguin is draw with the PEN TOOL. Color is applied using the EYEDROPPER which pick the true color from the reference. Sublayer is created to draw the details of the penguin like mouth and eye. ELLIPSE TOOL is used for the eye, and PEN TOOL for the mouth.

A new sublayer is created for the description. The ROUNDED RECTANGLE TOOL is used to create a white color space for the text. The text insert by using TYPE TOOL with 1pt black color STROKE, SHOWCARD GOTHIC character, regular and 150pt size.

Another new layer is created, the slogan ''KEEP IT UP'' is done by using the TYPE TOOL with 2pt STROKE and GRADIENT of red and purple color one by one. After that, the 3D EFFECT is applied to them and adjust the position.
Now is the turn of the sun, a new layer is created and the FLARE TOOL is used to created the sun, after that drag the sunlight to the ice caps.
After the main igloo is completed, COPY & PASTE it and applied the REFLECT to the sub-igloo. Adjust the size of the sub-igloo, and slightly ROTATE it and then put it far away.
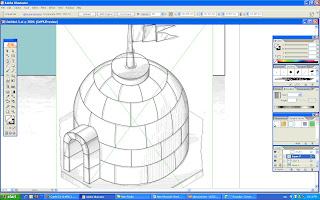
A new sublayer is created to draw the flag. PEN TOOL and ELLIPSE TOOL are used to form the shape of the flag. After that, the same color and gradient is applied like the previous step.
Like what i mention just no
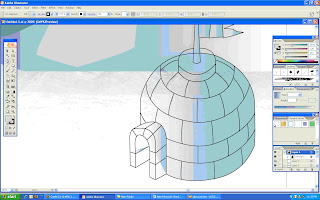
w, head of the igloo also mixed up with the body, so a new layer is created, the ELLIPSE TOOL is used to form a circle shape and the PEN TOOL is used to draw the base. The light blue color is applied with LINEAR 45o GRADIENT.

I found out that the door of the igloo is mixed up with the body so now i create another new layer for the igloo's door. Same, the PEN TOOL is using to draw the door, GROUP them and color it with light blue, LINEAR 45o of GRADIENT is applied.
A new layer is created for the igloo. This time i didn't copy from the previous assignment because there is a lots to improve and modify need to do , a references of igloo is insert and set as TEMPLATE. The PEN
TOOL is used to draw the body of the igloo. After that, GROUP them and color it with light blue, LINEAR 45o of GRADIENT is applied. 
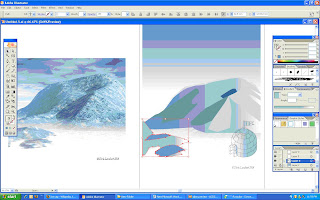
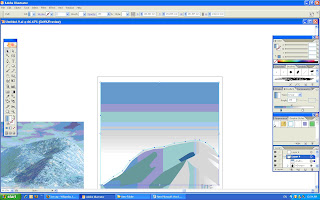
After That, a new layer is created again and the ice cap that i use is copy and paste from my assigment 2. The size and the position of the ice caps is changed.
Another layer is created and this time it will be the sky. Like the previous step, a RECTANGLE TOOL is used to form a bigger rectangle shape. The sky blue color is applied with the LIVE PAINT BUCKET and GRADIENT also.

First of all, the SHOW RULER and SMART GUIDES are opened to help me on the later works. After That i use the RECTANGLE TOOL to form a rectangle shape and apply the color using the LIVE PAINT BUCKET. The light blue color with the GRADIENT rectangle will be the ice land.

Tuesday, September 2, 2008

Project Charter & work in progress

Assignment 3 Title: KEEP IT UP
Project Start Date: August 19, 2008
Projected Finish Date: September 9, 2008.
Project Manager: Chua Wei Kang HP: 017-7688087 Email:vkang_mushroom@hotmail.com

Project Objectives: The main obejective of create this poster is to encourage human to continue saving the area, ice cap and also try to spread out the news to let more and more people take part in the saving area progress.So, i will create a complete scene of ice cap with igloo to show out what we, human have done in order to save the area, ice cap which have been affected by the global warming. This poster has related to my precious assignment, the symbol that i created on assignment 1 success create awareness to the public so that they start to prevent the global warming.

Approach: -Text will be insert in my poster which never done from last 2 assignment.
-Principle of design which i have learn in the design class will be use in in creating
my poster.
-a big font ''KEEP IT UP'' will be insert to my poster to encourage people continue
their good work in saving the area from global warming.
-i will keep the igloo and also the ice cap but i will try to modify and improve it.
-i will also add one o more igloo to make the poster merrier.
-the color of the ice cap and igloo will also be same,harmony but the font i will try
to apply some effect like 3D and wave
-the color of the text that i am going to use will be attractive color like purple and red.
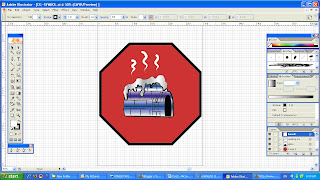
-the pen tool, rectangle tool, type tool, gradient tool will sure be use to create
this poster.

Comment: it is no easy to modify or to create a word


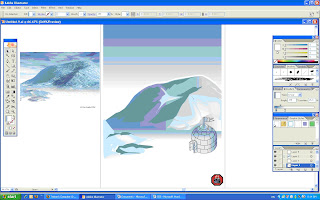
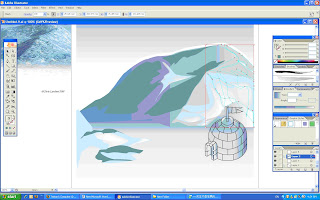
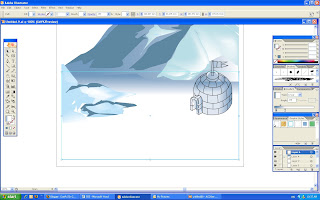
below are my work in progress, it is quite slow because i trying to modify the font again and again to get better effect. i will also put more sub-text to make my idea more clear on the poster.

Wednesday, August 27, 2008

SkeTcH of AssIngMent 3


this is my sketch for the assignment 3, with a big font ''KEEP IT UP'' to encourage people continue their good work in saving the area from global warming. Also, i will keep the igloo and also the ice cap but i will try to modify and improve it. i will also add one o more igloo to make the poster merrier. the color of the ice cap and igloo will also be same,harmony but the font i will try to apply some effect like 3D and so on, the color of the text will be attractive color like purple and red. i will pay attention to the print out because last time my printout color not same with what i have done in illustrator, so i get a bad marks for that T_T.

Monday, August 25, 2008

Assignment 3--IDeAtion n refeRenCEs

Ideation: i am going to create a scene of a complete ice cap to show out that we, human have done a lot of work to save the area which influencing by the global warming. The poster that i want to create purposely encourage human to continue saving the area and also try to spread out the news to let more and more people take part in the saving area progress.Text will be insert in my poster which never done from last 2 assignment.Principle of design which i have learn in the design class will be use in in creating my poster.
THE WEB LINK that i done my RESEARCH:
http://flickr.com/photos/kellyphotos/72256225/
http://thedude.com/archives/travels/greenland/
www.chockstone.org/NZ/MtCook/MtCookJohnKDec03.htm

below are some of the poster that i have search from the internet as the references:


Monday, August 18, 2008

Final Design of Assignment


Hehe><....this is the FINAL...[THE ICE CAP]...


Last but not least, the SYMBOL that i done in the first assignment is put on the bottom right-hand corner of the image.


MESH TOOL is using to adjust all those dark areas of the ice caps. The color and shape of the dark areas if modified.


Again, create a new layer and use the RECTANGLE TOOL to form a rectangle. This rectangle represent the land of ice, the dark blue color that picked by the EYEDROPPER TOOL from the COLOR window is applied on it. The GRADIENT then set.


A new layer is create again and the small ice cap is form by using the PEN TOOL also. Like what i did before, create a new layer to draw the dark areas with PEN TOOL. The color of the small ice cap is pick from the big ice cap and also the dark area with the EYEDROPPER TOOL.


Now is the turn of sky, i create a new layer and use PEN TOOL to form a square then apply the color of sky blue on it. The GRADIENT is set as LINEAR TYPE and 270' ANGLE.


GROUP all the lines together by pressing CNTRL+G or click OBJECT then choose the GROUP. After that, choose the color light blue color on the COLOR window by using EYEDROPPER TOOL and apply it to the igloo. The GRADIENT of the igloo is set.


After that, i open a new layer and pasted the reference of igloo and ZOOM it(CNTRL+ '+') which help us to draw correctly then start using the PEN TOOL to draw the igloo. i also use the ELLIPSE TOOL to draw the circle part like the top of the flag and also the big base of the flag. Adjust the shape till a suitable size and position.


After that, i create a new layer then i use the EYEDROPPER TOOL to pick the color on the pasted image, then i apply the color on the ice cap that i drew. I apply the GRADIENT to the ice cap. Another new layer is created to draw the dark areas of the ice caps by using PEN TOOL, the color of the dark areas is done by doing the same of the previous step.


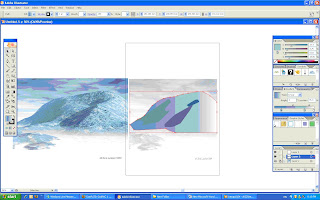
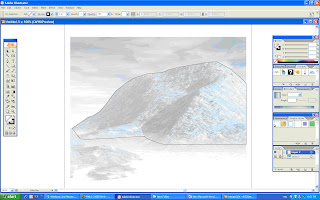
First of all, i click the VIEW to open the SHOW RULER and SMART GUIDES to help me on the later works. After that i paste the image of ice cap that i going to draw on the layer and set it as TEMPLATE(double click the layer to choose) to help me on the outline drawing, then i start using the PEN TOOL to draw the outline of the ice cap.

ReseArCh & Sketch & RefErence of assignment 2


The research that i have done on the melting of ice caps:
The area of global warming that i choose is the m
elting of ice caps. An ice cap is an ice mass that covers less than 50 000 km² of land area (usually covering a highland area). Masses of ice covering more than 50 000 km² are termed an ice sheet.Ice caps are not constrained by topographical features (i.e., they will lie over the top of mountains) but their dome is usually centered around the highest point of a massif. Ice flows away from this high point (the ice divide) towards the ice cap's periphery. Polar ice caps form because high-latitude regions receive less energy in the form of solar radiation from the sun than equatorial regions. This results in lower surface temperatures. Seasonal variations of the ice caps will take place due to varied solar energy absorption as the planet or moon revolves around the sun. Additionally, in geologic time scale, the ice caps may grow or shrink due to climate variation. See ice age, polar climate.Both of the Earth's ice caps are currently shrinking, possibly as a result of anthropogenic global warming.

The web links:
http://en.wikipedia.org/wiki/Ice_cap

http://www.thewildclassroom.com/biomes/icecaps.html
http://www.geocities.com/Yosemite/Rapids/4233/
ijsbergen.html


The Sketches:


The references and images that i used to create my work:

Tuesday, July 29, 2008

Ideation for Assignment 2

My ideation is to illustrate a complete igloo on the ica cap that means after human realized their fault that caused the melting of polar ice caps, human tried their best to tackle the global warming and hence solved the problem of ice caps melting.

below are some of my references and images of the igloo and ice cap:

Monday, July 21, 2008

FinAl SymBol--SteP bY SteP


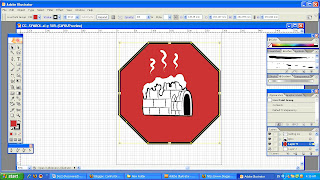
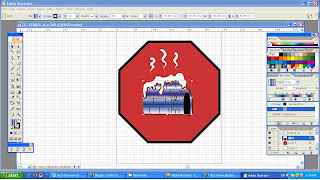
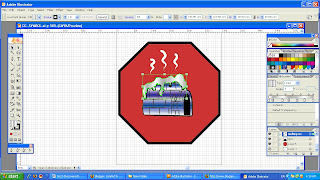
The symbol above is my final symbol for global warming based on polar ice caps melting. This symbol is done by using Adobe Illustrator CS 2. The white and blue melting igloo is the metaphor that represent the polar ice caps. The red octagon board which is actually the road signboard ''STOP'', to attract people's attention hence create an awareness of the area. The whole symbol carrying the message ''STOP the MELTING'', which means stop all the human activities that can cause the melting of polar ice caps.

RED: the red color of the octagon signboard which represent the dangerous to attract people's attention
GREY: Grey color represent th
e melting of ice which is not a good phenomena so i used dim color
BLUE: the color of igloo that
mix with white color
WHITE: the white color smoke that represent the
hot weather that cause the melting of ice


PROCEDURE:


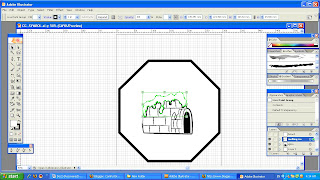
First, i select the mode SHOW GRID in the tool bar VIEW then i drew the octagon board by using the PENTOOL according to the given grid. After that i change th
e STROKE WEIGHT to 20pt to make the outlines bolder.


Continue using the PEN TOOL, i drew the outlines of the igloo n using LINE SEGMENT TOOL to draw the details of the igloo. Next, i select the igloo and applied the brushes effect(chalk scribble and dry brush4) on them.


After completing the igloo, i drew the ice melting that on the igloo with PEN TOOL again.
So far, the drawing part is done and
now left the color section.


I use the SELECTION TOOL to select the octagon board only, and then use LIVE PAINT BUCKET to fill up the octagon with red color. Next, i use BRUSHES with FUDE effect to draw the three going up's smoke which represent the hot weather.


Again select the SELECTION TOOL to select the igloo that i wan to color. I have applied white and blue color in the GRADIENT. I set the GRADIENT as linear type with angle 90 and adjust till the color that i satisfy.


Select the melting ice on the igloo with SELECTION TOOL, insert white and Grey color to the GRADIENT which is linear type and no angle and adjust the color after that.


Finally, the symbol is completed.The symbol title is
''the MELTING IGLOO''.^^